iStick Mod by Eleaf
The iStick by Eleaf is a tiny little box mod that comes in 3 different models, a 30 watt, 20 watt and an ultra mini-sized 10 watt. In this review we’ll go over all the features of this ultra-mini box mod and why this is one is a must have for any vaper!
» Get the 30 watt for $34.99
» Get the 20 watt for $34.99
» Get the 10 watt Mini for $24.99
Which one is right for me?
Eleaf have offered 3 models to cover a variety of needs. I have to say I’m very impressed with this lineup – these are all very solid mods, they are tiny and they are very affordable.
One thing you need to understand is the limitations of each. The 30 watt will let you sub-ohm vape down to .4 ohm builds. This means it will indeed work with the Aspire Atlantis and the Kanger Sub Tank. It will also work with anything you build yourself as long as its above .4 ohms.
The 20 watt and the 10 watt mini will work with anything over 1 ohm.
You also need to understand that these are tiny. 22mm diameter tanks and atomizers will look really big on these devices.
Personally my favorite pairing is the 20 watt model paired with the Aspire Nautilus Mini. My sweet spot is the 1.8 ohm coil at 15 watts. This is a very nice vape and is my official travel rig now. It just works – the battery life is outstanding and there’s no fiddling around with anything.
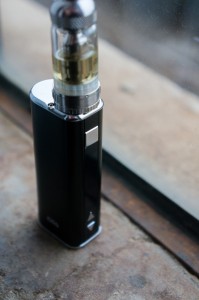
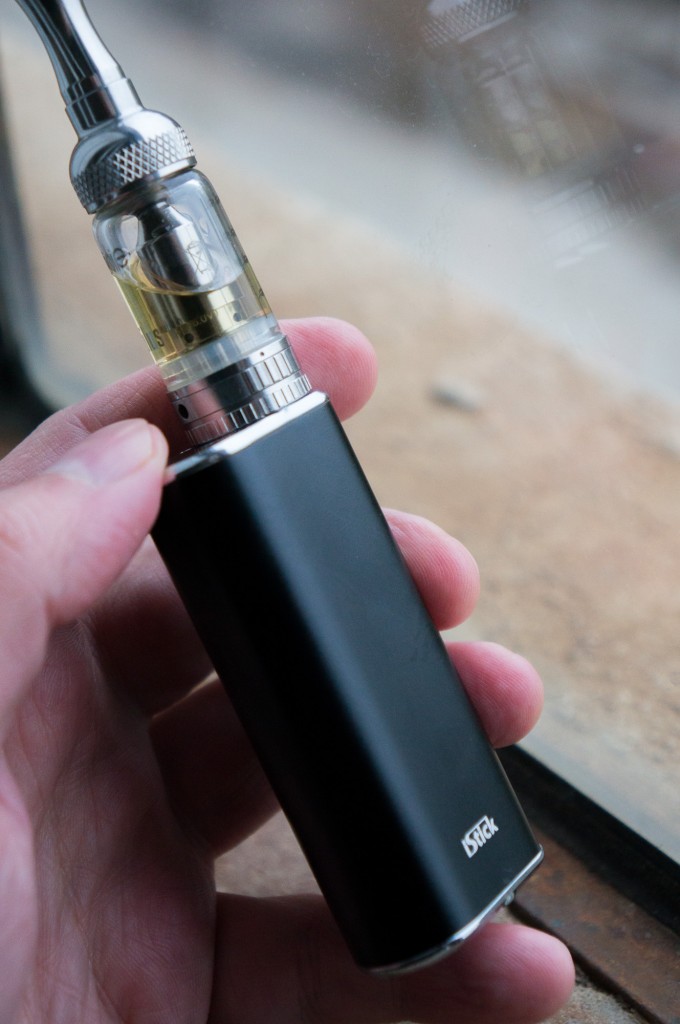
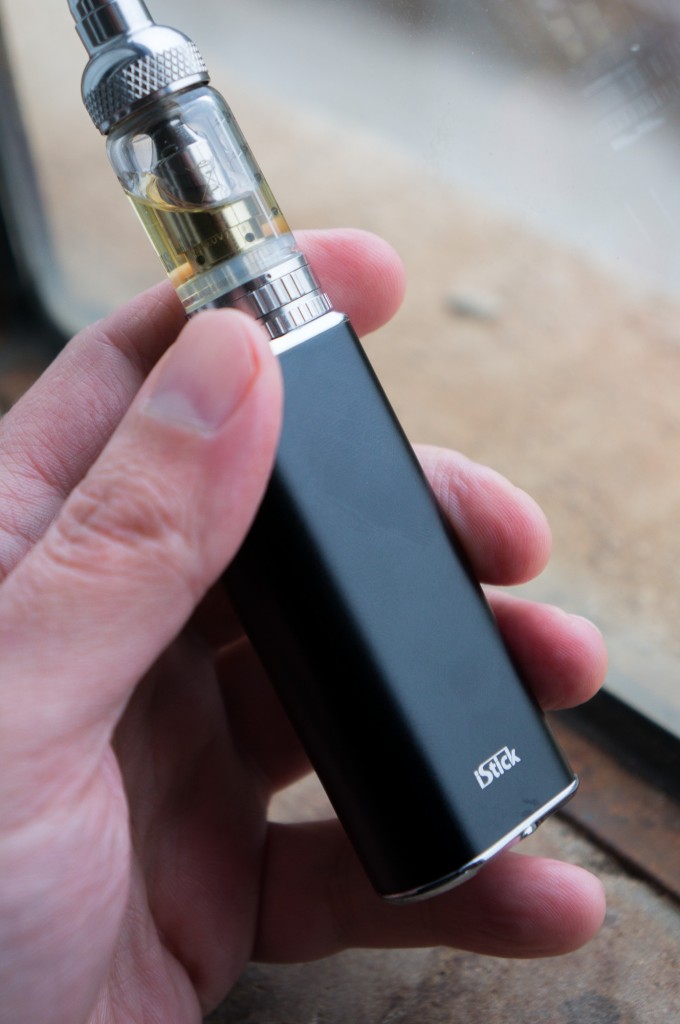
The iStick is tiny. I mean really tiny! At only 72mm tall, this thing is a beast performer delivering up to 20 watts of power and features a built in, 2200 mAH battery. This makes it absolutely essential for travel, work, driving or any other situation where you want a simple box mod. And this one is better than the others in that it delivers more power in a smaller size.
iStick Features
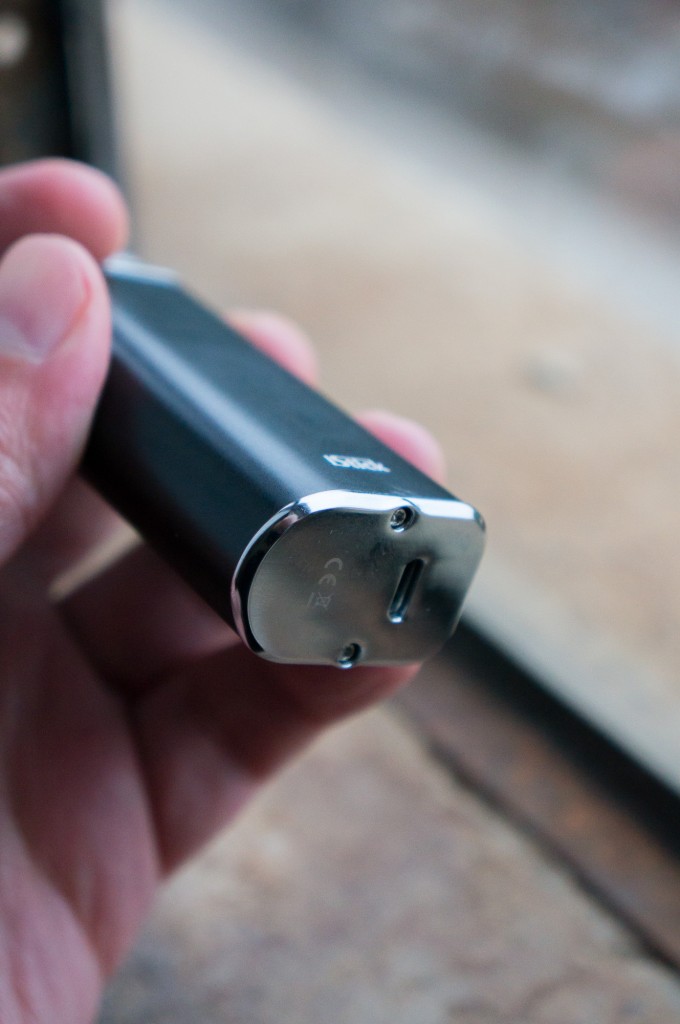
The iStick features a 510 connection and includes an ego adapter. Its not built for sub-ohm builds, which isn’t really a deal breaker. There’s still plenty of power, you just can’t go throw your sub-ohm coiled favorite RDA on here. But that’s really not the point. I travel quite a bit and honestly I get tired of mech mods and juice when dealing with airports or when driving a rental car. With the iStick I can carry a few tanks, throw one on the iStick and get a very good vape when I don’t want to fool around with anything else.

iStick Mod by Eleaf
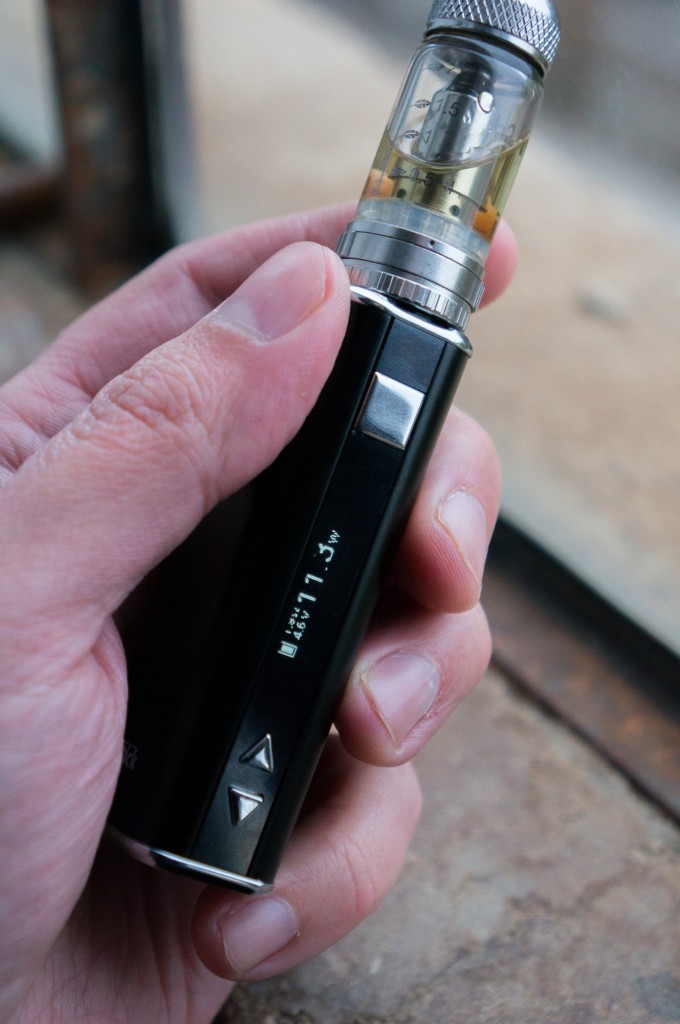
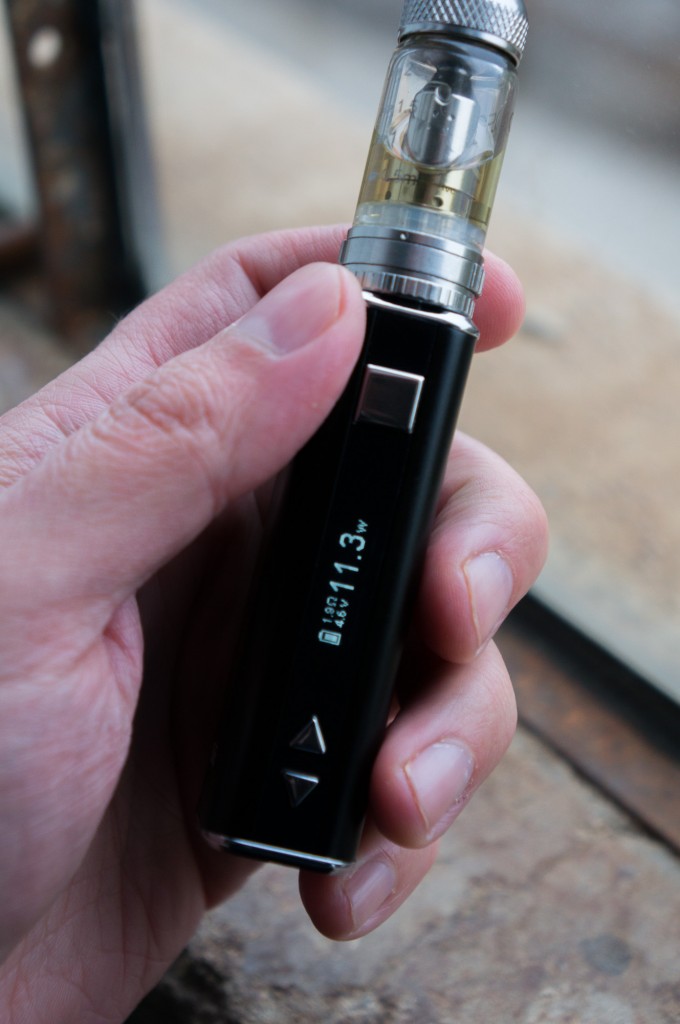
The eleaf iStick features 3 buttons and a nicely readable display. You’ve got the fire button and 2 smaller “up and down” buttons for adjusting the amount of wattage or voltage depending on what mode you’re in.
Press the fire button 5 times consecutively to turn on and off the device. Press it 3 times consecutively to switch between variable voltage and variable wattage. I prefer wattage personally on this type of device as the chip will automatically calculate the voltage. Variable voltage is an older mode that mods originally worked with – its there if you want it, but the much preferable mode of variable wattage is probably what you want to be in.
The LCD display is beautiful. When you turn the device on, you’ll see the ohm reading for your atomizer, voltage, wattage and remaining battery life. As you’re firing you see a timer counting the seconds that have passed. If you get to 10 the unit stops firing. This is essentially a built in safety to keep it from burning up if you forget to lock the device after you’ve put it in your pocket.
In addition, the iStick also features low voltage protection, low battery protection, and atomizer short protection. This is a very well thought out device.
The performance is excellent. I’ve not tested this scientifically, but I’ve got several other variable wattage mods. With my Aspire Nautilus I like to keep the wattage at 15 or so. I’m using the 1.9 ohm coils. The iStick performs as well as any other device I’ve compared it to and is a LOT cheaper!
Obviously as you can see from this site I’ve got a lot of vaping gear. But there are times where I want something really simple that just works. In fact, at this price point I might pick up a second so I’ve got a spare if I forget to charge or something. I use this non-stop while I’m traveling because its just so simple and easy to use. There’s nothing to fiddle with which makes it perfect for vaping in the car as well. I really like this device.
This mod is not only great for seasoned vaper’s but I think its perfect for beginners. I used to recommend the iTaste MVP over any starter kit, but the iStick now blows the doors off of the MVP. This little mod is a game changer and I highly recommend getting yours today!
» Get the 30 watt for $34.99
» Get the 20 watt for $34.99
» Get the 10 watt Mini for $24.99


Its even better if you use the 20w istick with the kanger subtank mini.
As long as you use the 1.2 ohm coil and not the 0.5.
I was using the istick with the nautilus mini which is a good combo but the combo above is even better.
Your right. The istick 20w is a excellent device
you used the new sub tank mini with it????
I love this device. It’s size and power lets you put out some decent clouds in stealth mode: black 30w, black Little Boy (dual macros @ 0.7). Looks nice and sleek plus you can palm the whole rig. It’s not a world beater, but it’s simple, small, and reliable…… Great for work and travel.
I got the 20W with the Nautilus Mini about 2 weeks ago and have no complaints my first was the Kanger Evod glass which was garbage in comparison. I have a question if anyone can answer I’d appreciate it. I noticed that the ohm value has increased since I first started to use it. The coil is 1.8 ohm and rightnow the display reads 2.1ohms yesterday it was at 2.0ohms. Is that a sign the coil is going bad or is that normal? It’s the same coil that was in what I first bought the tank.
Completely normal, they’re accurate to 0.1-0.2 ohm’s so you will tend to see a bit of fluctuation in the ohm’s reading. 🙂
I just got one of these and I am a complete noob to vaping. One query I would have and perhaps you can help me out. Is this device meant to drop te watts when you are not using it? I have had mine up at 9w but then I’ll go to use it a minute later and its dropped to 4.2 – 4.3
Thanks
Бурение скважин на воду в Минске: Автономное водоснабжение
Одним из ключевых моментов для дачников является обеспечение качественного водоснабжения. Наилучший способ получить доступ к чистой воде – это бурение скважины на участке. Это особенно важно для жителей Минска и области, где найти профессионалов не составит труда. В данной статье мы рассмотрим, что собой представляет бурение скважин на воду в Минске и Минской области, и чем это выгодно.
Этапы бурения скважины
Пробуривание скважин – это многоступенчатый процесс, которая содержит несколько основных шагов:
1. Предварительное обследование участка
Сначала необходимо изучить особенности участка, чтобы найти подходящее место для бурения. Необходимо учесть характеристики почвы, наличие подземных вод и возможные загрязнители.
2. Проектирование
Проект составляется после анализа местности, который учитывает подбор глубины, выбор оборудования и материалов.
3. Бурение и монтаж
Непосредственно процесс бурения осуществляется с использованием специального оборудования. После достижения необходимой глубины устанавливаются водопроводные трубы, фильтры и системы подачи воды.
4. Финальная настройка системы
Финальная стадия подразумевает испытание водоснабжения и интеграцию с домашней водной системой. Производится контроль качества воды и уровня подачи.
Плюсы бурения скважин
Создание скважины для воды в регионе обладает множеством преимуществ по сравнению с другими системами водообеспечения:
• Безопасная для питья вода
Скважинная вода не загрязнена, которые не подвергаются воздействию поверхностных загрязнений. Это гарантирует высокое качество воды.
• Самостоятельное водоснабжение
Отсутствие зависимости от городской сети. Это особенно важно для дачных и загородных участков, где нет централизованного водопровода.
• Длительный срок службы и надежность
Скважина, сделанная специалистами, отличается долговечностью, обеспечивая бесперебойную подачу воды круглый год.
Особенности выбора компании для бурения
Чтобы найти надежного подрядчика, учитывайте несколько основных критериев:
• Профессионализм фирмы
Компании с долгим стажем имеют необходимый опыт и квалификацию для выполнения сложных работ.
• Гарантия на услуги
Убедитесь, что компания предоставляет гарантии.
• Оценка предыдущих проектов
Ознакомьтесь с примерами работ и рекомендациями заказчиков. Это даст представление об уровне сервиса.
Обеспечение водой через скважину – это выгодное вложение для организации автономного водоснабжения.
Бурение скважин на воду в Минске: Независимый источник воды
[img]https://i.ibb.co/Byj8PQR/2.jpg[/img]
Одной из главных задач для владельцев загородных домов является наличие надежного водоснабжения. Лучший вариант для подачи воды – это бурение скважины на участке. Это особенно важно для жителей Минска и области, где выбор компаний, предлагающих подобные услуги, довольно велик. [url=https://dk.pinterest.com/pin/911134568379311051/]В данной статье[/url] мы рассмотрим, что собой представляет услуга бурения скважин на воду, и чем это выгодно.
Процесс бурения
Пробуривание скважин – это сложная работа, которая состоит из несколько основных шагов:
1. Подготовительные исследования
Перед стартом бурения производится оценка территории, чтобы определить оптимальное место бурения. Следует принимать во внимание особенности грунта, местоположение водоносных слоев и экологические факторы.
2. Создание плана работ
Проект составляется после анализа местности, который учитывает подбор глубины, выбор необходимых устройств.
3. Бурение и монтаж
Само бурение проводится с использованием специального оборудования. После бурения до требуемой глубины устанавливаются системы фильтрации и водопроводные коммуникации.
4. Завершающий этап работ
В конце проводится проверку оборудования и подключение водоснабжения к дому. Проверяется уровень чистоты воды и производительность.
Преимущества бурения скважин на воду
[img]https://i.ibb.co/Tvkw1M8/3.jpg[/img]
Создание скважины для воды в регионе имеет ряд существенных преимуществ по сравнению с альтернативными методами подачи воды:
• Безопасная для питья вода
Скважинная вода не загрязнена, которые не загрязняются сверху. Это гарантирует безопасность использования.
• Автономность водоснабжения
Отсутствие зависимости от городской сети. Это особенно важно для дачных и загородных участков, где нет централизованного водопровода.
• Стабильность и прочность
Правильно обустроенная скважина может служить десятилетиями, обеспечивая бесперебойную подачу воды круглый год.
Особенности выбора компании для бурения
[img]https://i.ibb.co/X4HL2qm/1.jpg[/img]
При выборе компании для бурения скважины на воду важно обратить внимание на несколько ключевых факторов:
• Опыт работы
Компании с долгим стажем имеют необходимый опыт и квалификацию для выполнения сложных работ.
• Гарантии качества
Убедитесь, что компания предоставляет гарантии.
• Оценка предыдущих проектов
Посмотрите портфолио компании и отзывы клиентов. Это поможет оценить профессионализм компании.
Создание собственной скважины в Минске – это эффективное и надежное решение для получения качественной воды.